WordPress Live Scores Plugin
On this page you will find the instructions for donwloading, installing, configuring, activating, and publishing our wordpress live scores plugin. You can also watch our youtube explainer video
Step 1: Download
Download our live scores wordpress plugin archive, in order to start the installation and configuration process. Continue reading further down and follow the steps to complete the setup of the plugin.
Step 2: Install the plugin
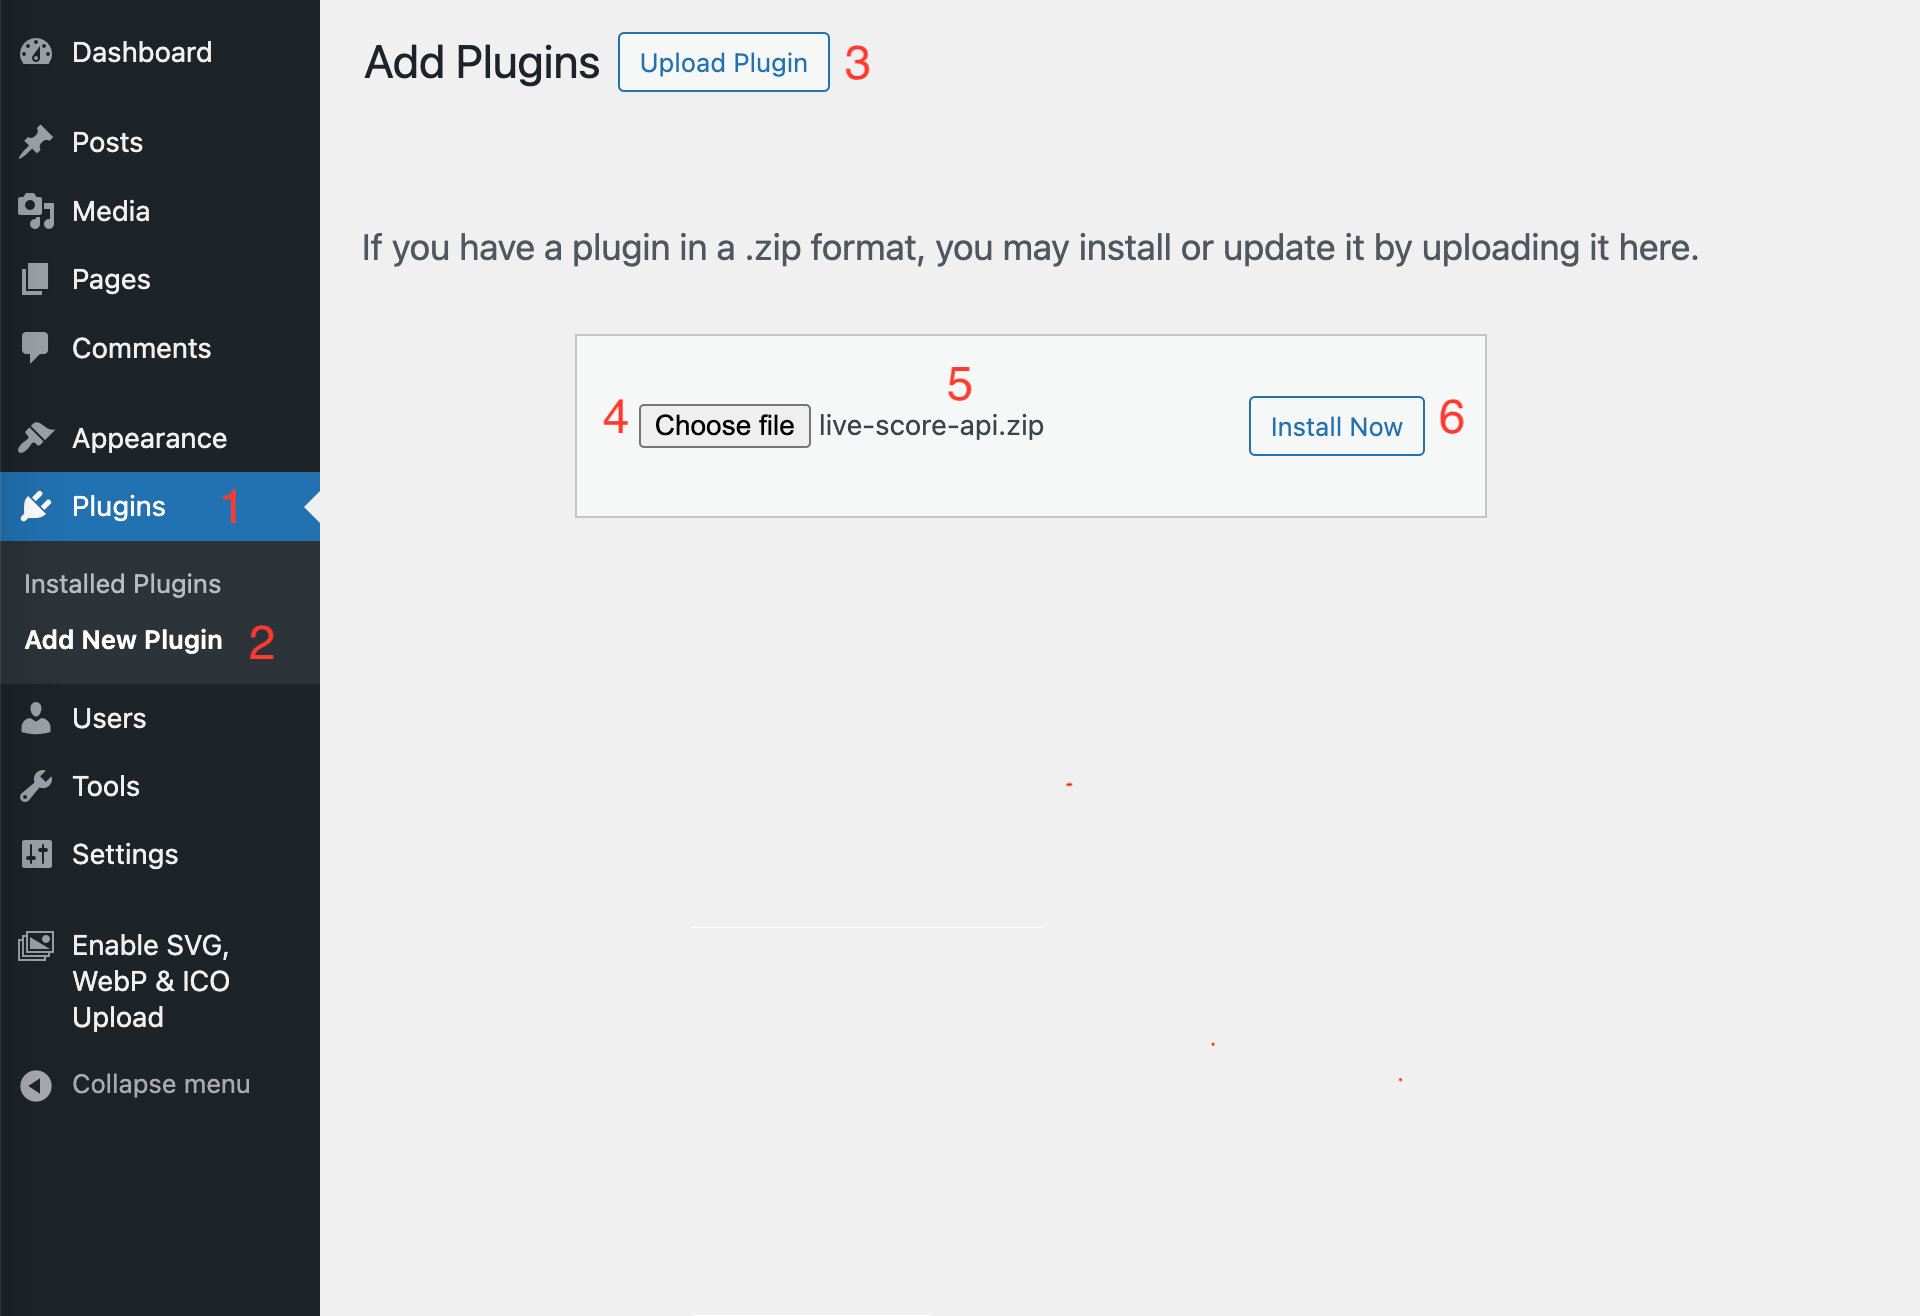
- 1. Login in your wordpress admin panel.
- 2. Locate and click on the "Plugins" menu item.
- 3. Click on the "Add New Plugin" menu item.
- 4. Click on the "Upload plugin" button.
- 5. Click on the "Choose file"/"Browse" button.
- 6. Locate the plugin .zip file and choose it.
- 7. Click on the "Install Now" button.
Step 3: Activate
Once the installation is completed you need to activate the plugin by clicking on the "Activate Plugin" button that you will see on the screen.

Step 4: Configuration
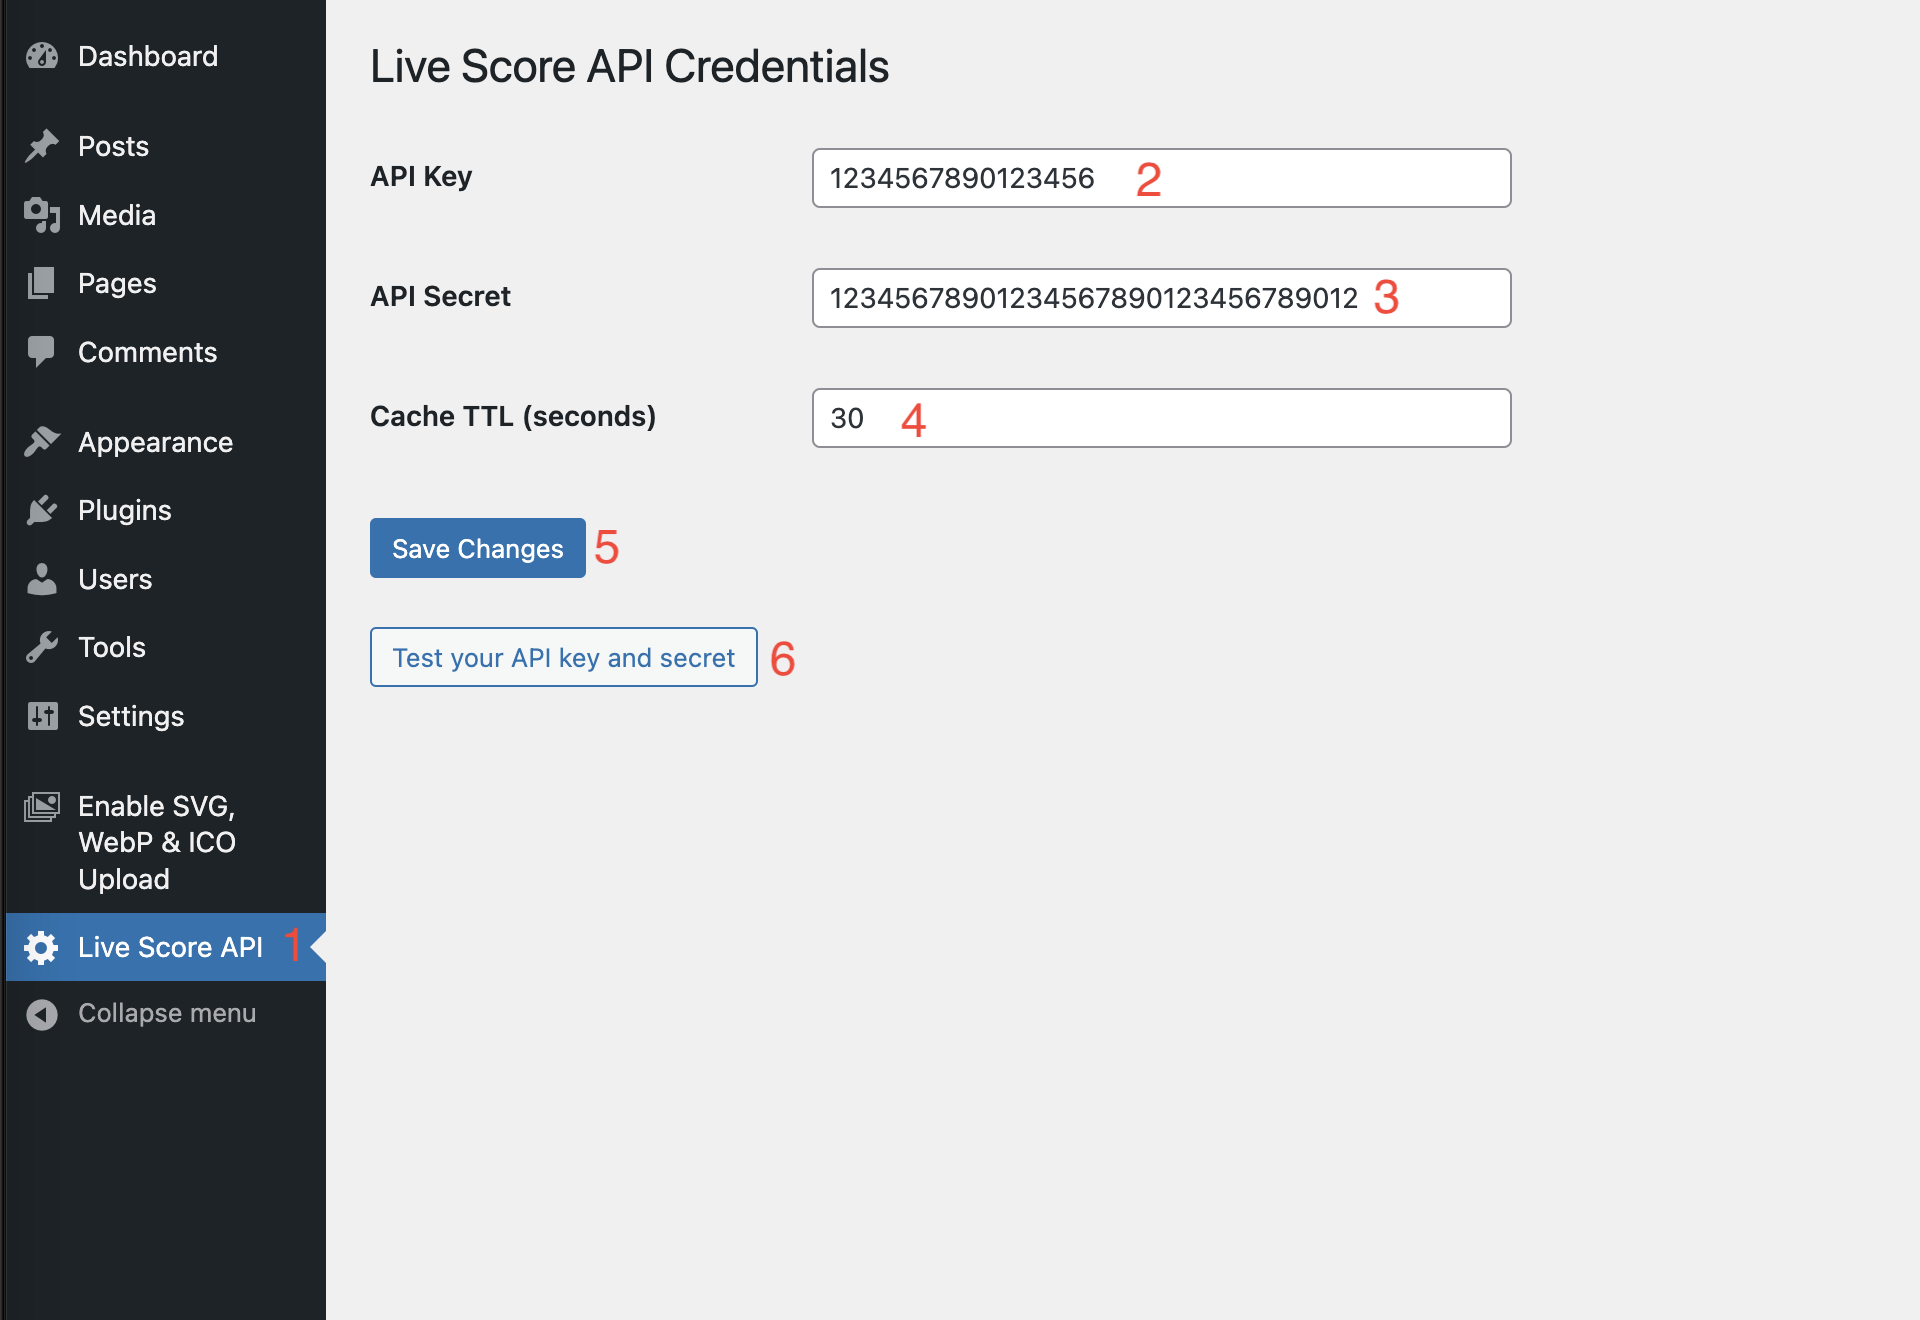
- 1. Locate and click the "Live Score API" menu option.
- 2. Input your API key from your profile.
- 3. Input your API secret from your profile.
- 4. Input the number of seconds for cache preservation. The bigger the naumber the less requests your wordpress will make to our servers. This number also controls how often the widget will refresh the widget.
- 5. Save the changes.
- 6. Test the setup to make sure that everything is working fine .
Step 5: Publish
Navigate to the administration section of the page, toolbar, menu, etc... where you want the widget to be visible and
insert the following short code: [live-score-api widget="live-scores"].
